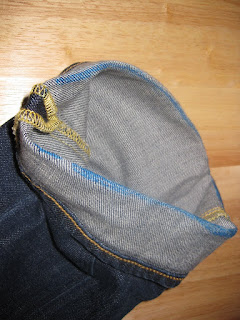
A Google search on "how to hem jeans" will give you much better instructions than can be found on my blog. However, those instructions show how to re-use the original hem. Instructables has one such method. And last year, when I first searched for how to hem jeans, I used the instructions on Dacia Ray as my manual.
In both these methods, you use/reuse the original hem. In the Instructables entry, you cut off, then re-attach, the original hem. With Dacia, you fold over the extra fabric and sew the hem higher on the leg. Both are good methods. However, I, personally, had some issues. First, I wasn't crazy about having the extra fabric along where you re-stitch the hem. Yes, you iron it flat, so you can't feel it or see it, but knowing it was there still bothered me. Second, I have no sewing machine, and being a fairly inexperienced seamstress, I had difficulty with sewing the perfectly straight line that I wanted. Since I was not intent on saving the original hem, I did my own variation.
1) Measure the desired length of the jeans, pin, and iron the jeans. Mark the folded edge. I will call this the Fold Line.
To measure the length on the jeans needing hemming, I laid them down over an old pair of jeans that were the same brand and style, but had a length I liked. This worked well for me. However, putting on the jeans that need hemming, wearing the shoes that you want to wear with them, and pinning in front of a mirror, is probably best.
I used washable marker for all markings.
2) Measure the Hem Height. That is, measure from the outside edge of the hem, to where the hem is folded under. The stitching should be between these points. Note the measurement. Now, from where you folded and marked the jeans, measure two Hem Heights out. Use a ruler to help mark this 2X Hem Height.
3) Cut the jeans along the 2X Hem Height line. Turn the jeans inside out. Fold the cut edge up, so that the cut edge lines up with the Fold Line . Iron.
4) Fold jeans up again, along the Fold Line. Iron and pin.
5) Turn the jeans right side out. Measure the stitch height from the original hem. Mark the Stitch Height on the outside of the jeans.
6) Sew across the jeans using the Stitch Height Line as a guide. Since even that, my stitches still come out a little crooked, I use a small metal guide (actually a bookmark) and hold it along the line. This results in very very straight stitches.
7) I then went back over the stitches using a Double Running Stitch.
(Just now, I was trying to find out the name of the stitch I was using to hem my jeans. It took me half an hour to get to "double running stitch". I have no recollection about how a year ago I found out about the double running stitch, or why I chose it--It's apparently an outdated Elizabethan stitch. Today, people with any sense use the "back stitch.")
8) At this point the hem looks flat and obvious. However, once the jeans are laundered, they develop the desired weathering and puckering.


0 comments:
Post a Comment